Ever since I took my first bite of injera at a tiny Ethiopian restaurant downtown, I’ve been hooked.
That perfect tangy flavor, the spongy texture that soaks up all the delicious sauces—it’s culinary magic!
After years of trial and error in my kitchen (and yes, some spectacular failures), I’m thrilled to share my no-pressure guide to making original injera at home.
I promise you this: making injera isn’t as intimidating as it seems. With a bit of patience and the right technique, you’ll be serving up this ancient flatbread like a pro.
Ready to impress your friends with your international cooking skills? Let’s swoop into this teff-tastic trip together!
A Brief History: The Story Behind the Spongy Delight
Injera dates back thousands of years in Ethiopian and Eritrean cuisine. Made from teff—an ancient indigenous grain cultivated since 4000 BCE—this bread is both culturally and nutritionally significant.
The natural fermentation process was originally a method of food preservation while improving nutritional value.
In Ethiopian dining, injera serves as a plate, utensil, and food all at once. Meals are shared from a communal platter lined with injera, with additional rolls used to scoop up stews and vegetables—a tradition symbolizing unity and connection among family and friends.
Injera Recipe Ingredients
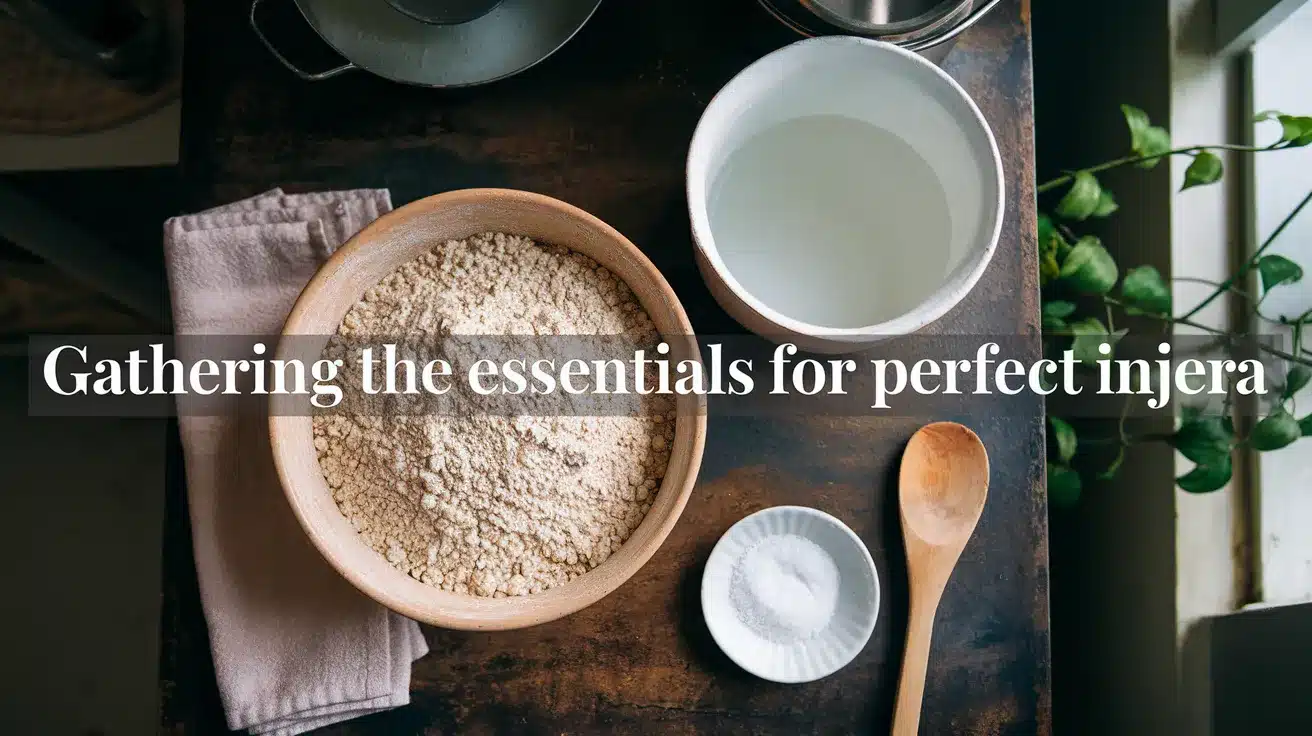
- Teff flour—this tiny grain packs a BIG punch! It’s naturally gluten-free and packed with nutrients.
- Water—simple, clean, and essential for that perfect consistency.
- Salt—just a pinch to enhance all those complex fermented flavors.
- A bit of patience—the secret ingredient that transforms good injera into GREAT injera!
Kitchen Essentials for Injera Success
- A large bowl to mix up that batter, a griddle to get it crispy, and your trusty ladle to create perfect circles of magic.
- A clean kitchen towel to cover your fermenting batter—it needs to breathe but stay protected!
- A spatula for that perfect flip (though traditional injera only cooks on one side).
- Your sense of adventure, because good cooking is always about exploration.
Injera Recipe for Beginners: Step-By-Step Guide
Step 1: “Whisk it good!”
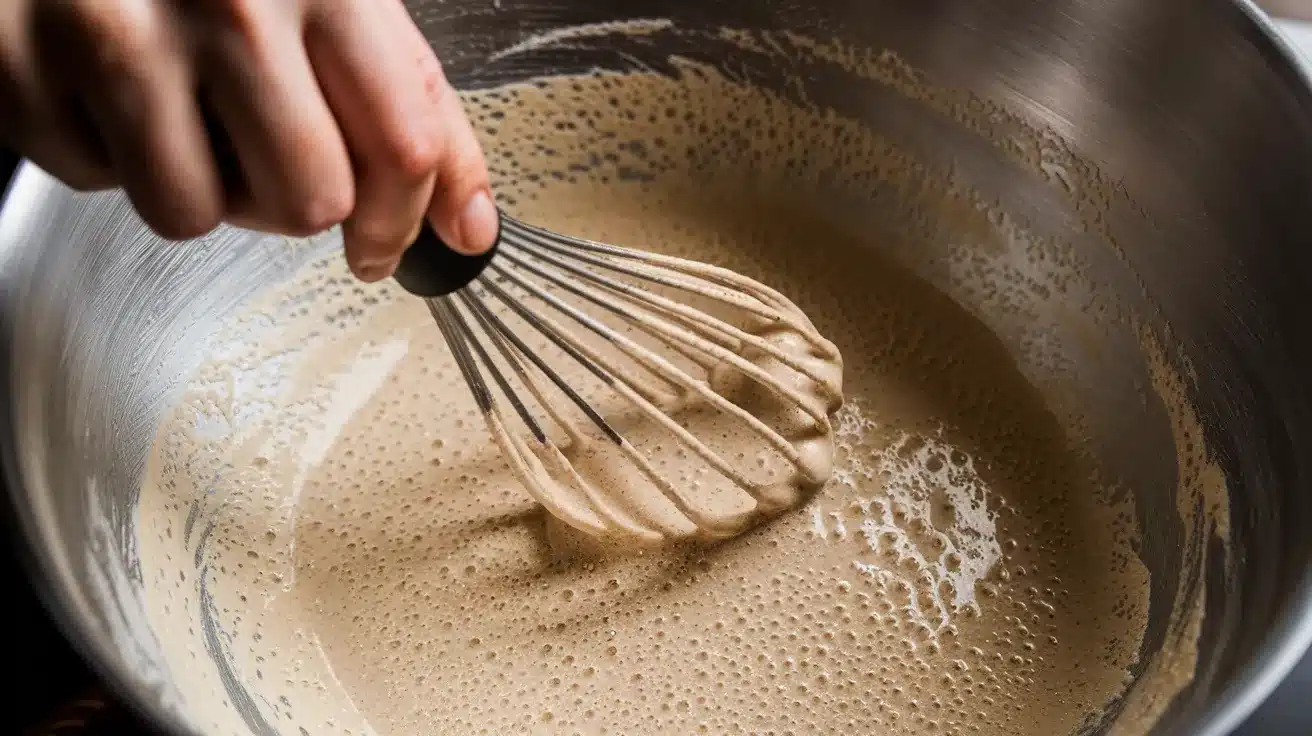
Mix 2 cups of teff flour with 3 cups of water in your large bowl. Whisk until smooth, like you’re a DJ scratching a record—rhythm is key! The consistency should be similar to crepe batter, flowing easily but with enough substance to hold its shape when cooked.
The first mix is your chance to feel like a true master baker. Get in there and mix with confidence! Break up any lumps and ensure everything is incorporated evenly.
Step 2: “Let it Chill… or, Rather, Ferment!”
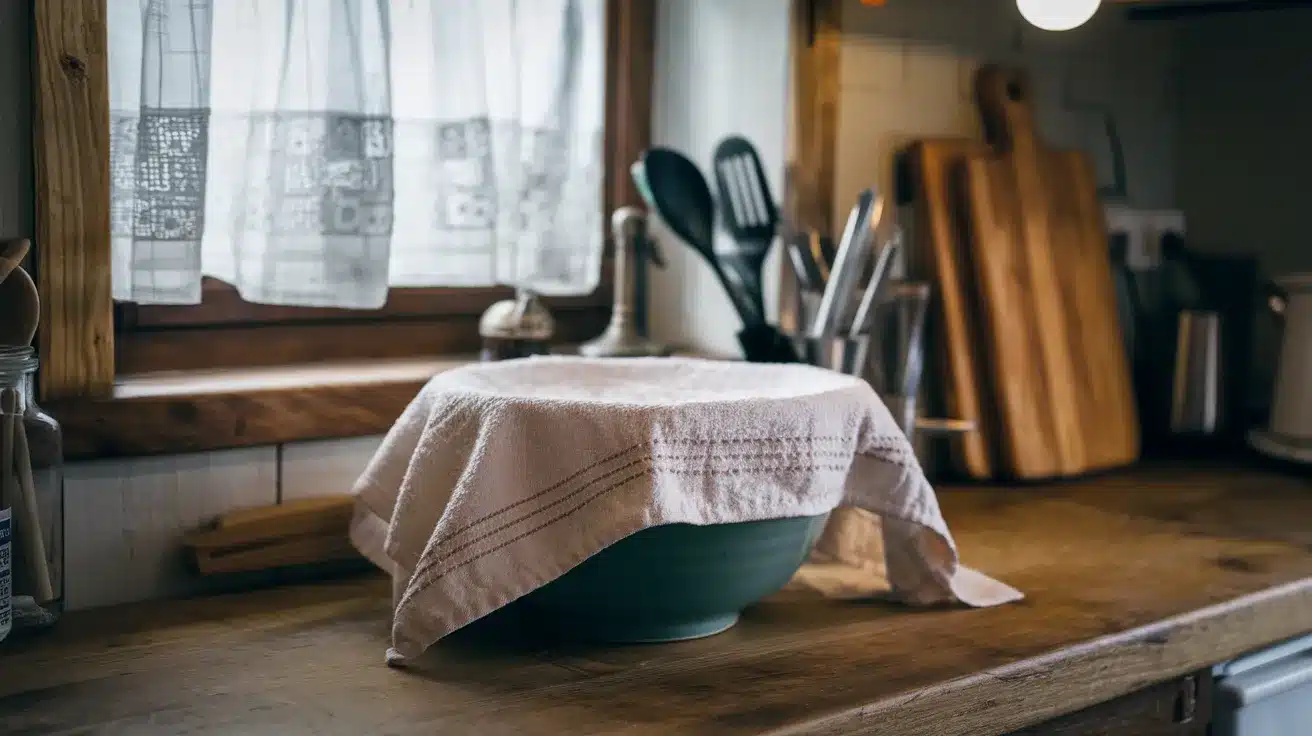
Cover your bowl with a clean kitchen towel and let it sit at room temperature for 1-3 days. Yes, days! This is where the magic happens.
The fermentation process is beautiful chemistry in action. Wild yeasts and beneficial bacteria are working hard to develop that signature tangy flavor that makes injera so special. You might notice bubbles forming and a slightly sour smell developing—these are good signs! Your batter is alive and thriving.
Remember: patience = perfection. Don’t rush this step; good things come to those who wait!
Step 3: “Hot Griddle, Here We Come!”

Once your batter has fermented to tangy perfection, it’s showtime:
- Heat your griddle or non-stick pan over medium heat.
- Pour about ¼ cup of batter onto the center of the pan in a spiral motion, working from the outside in.
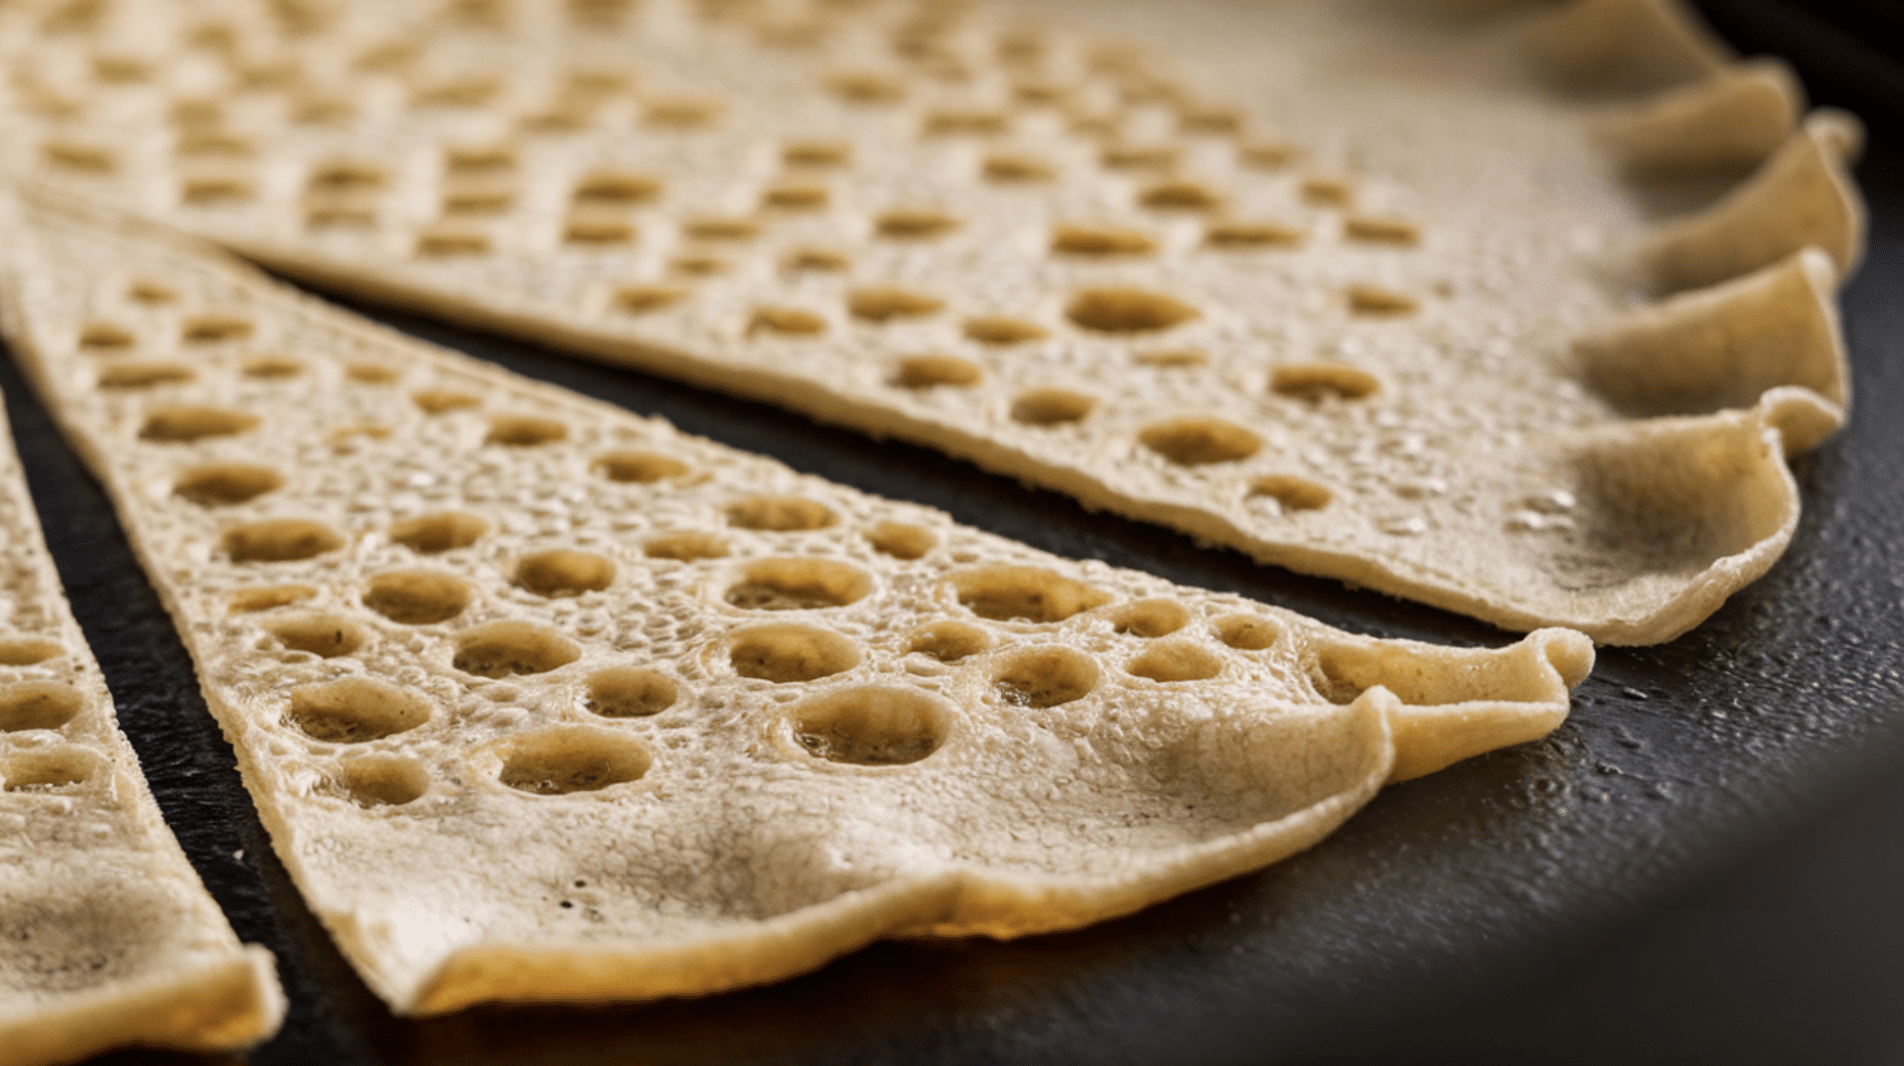
- Don’t touch it! Let the injera cook undisturbed as bubbles form across the surface—these “eyes” are the hallmark of perfect injera.
- When the edges start to lift and the center is set (about 2-3 minutes), it’s done!
Traditional injera isn’t flipped—it cooks from the bottom up, creating that signature spongy texture with all the bubbles. Pour the batter onto the griddle like a pro, with a smooth, confident motion to ensure even thickness.
Step 4: “Done? Or Almost?”
You’ll know your injera is just right when:
- The surface is completely dry
- Beautiful bubbles have formed all over
- The edges are slightly curling up
- It has a springy, spongy texture when touched lightly
Slide your finished injera onto a plate to cool slightly before serving, or stack them with a light cloth between each to keep them from sticking together.
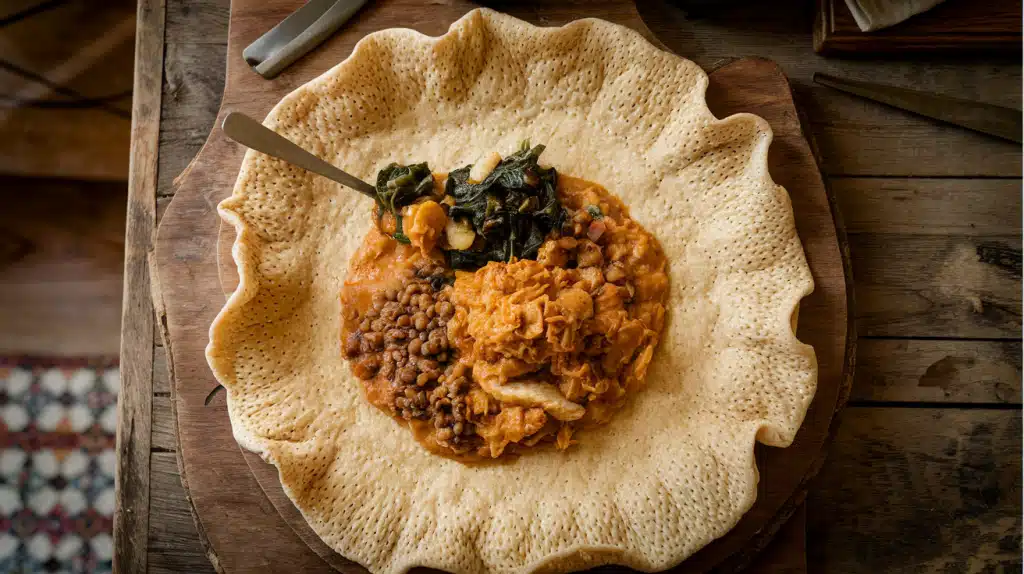
How to Serve Injera Like a Total Foodie?

Now for the best part—dipping! No, really. Injera is THE dipping vehicle for stews and spicy dishes. Its slight tanginess complements rich, spicy foods perfectly.
In Ethiopia, injera is both your plate and your utensil. Traditional serving involves laying a large piece of injera on a platter and arranging various stews and dishes on top. Tear off pieces from the edges and use them to scoop up the delicious toppings.
- Top it with your favorite Ethiopian stew (doro wat, anyone?), or try using injera as a wrap for all your favorite fillings.
- Create a fusion feast by serving injera with Indian curry, Moroccan tagine, or even as a base for Mediterranean mezze.
- Make mini injeras for an Ethiopian-inspired appetizer night—top each small round with different flavors for a tasting adventure.
- Breakfast injera? Absolutely! Top with scrambled eggs, avocado, and a sprinkle of berbere spice for a morning twist.
Leftover Injera? No Problem!

Turn leftover injera into crispy chips or even a funky pizza crust. “Who said you can’t have fun with leftovers? Injera can do it all!”
- Injera chips: Cut leftover injera into triangles, brush lightly with oil, sprinkle with salt and berbere spice, then bake until crispy. Perfect for dipping in hummus!
- Injera pizza: Top a piece of day-old injera with sauce, cheese, and your favorite toppings, then bake until bubbly and golden.
- Injera breakfast rolls: Spread with cream cheese, add smoked salmon and herbs, then roll up for a quick breakfast.
- Crispy injera croutons: Cut into cubes, toss with olive oil and herbs, then bake until crunchy for a unique salad topping.
Pro Tips for the Perfect Injera (No Pressure, Just Fun!)
- Bubbles not showing up? Don’t sweat it. Try adding a pinch more water to thin out the batter slightly, or make sure your pan is hot enough before pouring.
- Batter too thin? If your injera is tearing or too delicate, add a little more teff flour to give it structure.
- Burnt edges? We’ve all been there. Let’s keep things low and slow for perfect results. Turn down the heat a bit and give it another go!
- First pancake rule applies: Just like with regular pancakes, don’t be discouraged if your first injera isn’t perfect. The pan needs to season a bit, and you need to find your rhythm.
Pro tip: Fermentation time can vary depending on your kitchen vibe—treat it like a pet, check it regularly! Warmer kitchens will ferment faster, cooler ones slower. The perfect ferment should have a pleasant sour smell, not an unpleasant one.
Conclusion
Creating injera at home connects me to a rich culinary tradition that spans thousands of years. Each time I make it, I appreciate both the simplicity of its ingredients and the complexity of its flavor.
Remember, the beauty of injera lies in its imperfections. Those unique bubble patterns tell the story of your personal fermentation quest. My first attempts were far from Instagram-worthy, but the process taught me patience and the joy of slow food.
Whether you’re serving it traditionally with Ethiopian stews or experimenting with fusion creations, injera brings something special to your table. It converts meals into communal experiences where food becomes the centerpiece of connection.
So hug the tangy aroma filling your kitchen as you master this ancient bread—it’s the fragrance of culinary heritage coming alive in your hands.